

How To Include A Footer Template In Laravel 5.5
Creating the layout is an of import part of any project. Realizing this, Laravel comes with a Blade templating engine which generates HTML based sleek designs and templates. All Laravel views built using Blade are located in resource/views.

Bootstrap is well known in the development circles for impressive design options. Laravel makes it incredibly piece of cake to use Bootstrap templates in the projection's views. In this tutorial, I volition demonstrate how Bootstrap templates could be used within the Laravel Blade engine.
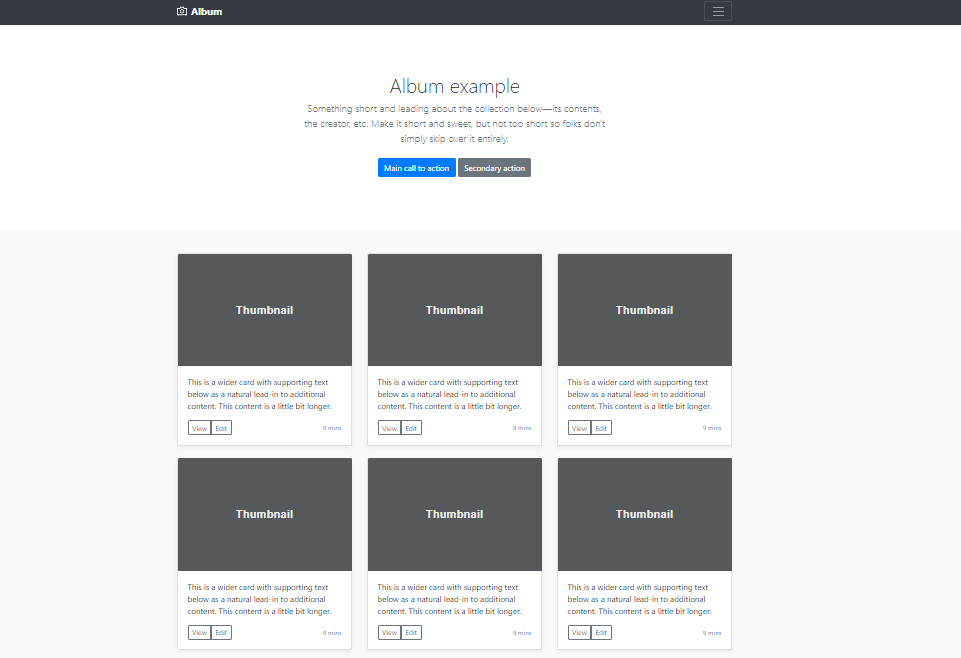
Integrating the Bootstrap template with Laravel is a simple process. All you need to do is cut your HTML Bootstrap into tiny Blade template contents, and then use, extend and/or include the templates in the main Bract file. To demonstrate the procedure, I volition use the Album Example For Bootstrap
-
- Create Layout File
- Create Fractional Files
- Testing the Integration
- Create the Routes
- Integrate bootstrap admin template in Laravel
- Download Cool Admin Dashboard
- Config Route
- Add Controller
- Ready Theme Blade Files
- Sidebar
- Home
- Employee Tabular array
- Popular Laravel Bootstrap Templates
- OneUI
- Material Dashboard Laravel
- Blackness Dashboard Laravel
- Bending
- To Sum Upwardly
A uncomplicated prerequisite is a fresh installation of Laravel v.5.
10x Faster Laravel Hosting with 24*7*365 Tech Support
Hassle-free laravel hosting which lets you lot focus on growing business
Create Layout File
Before creating the layout file, you need to sympathise the Laravel file structure. For this, I recommend reading my commodity on creating Laravel layouts using the Blade templating engine.
Now let's take a await at the code of the template page and place the different parts of the folio. Keep these parts in separate files for piece of cake direction.
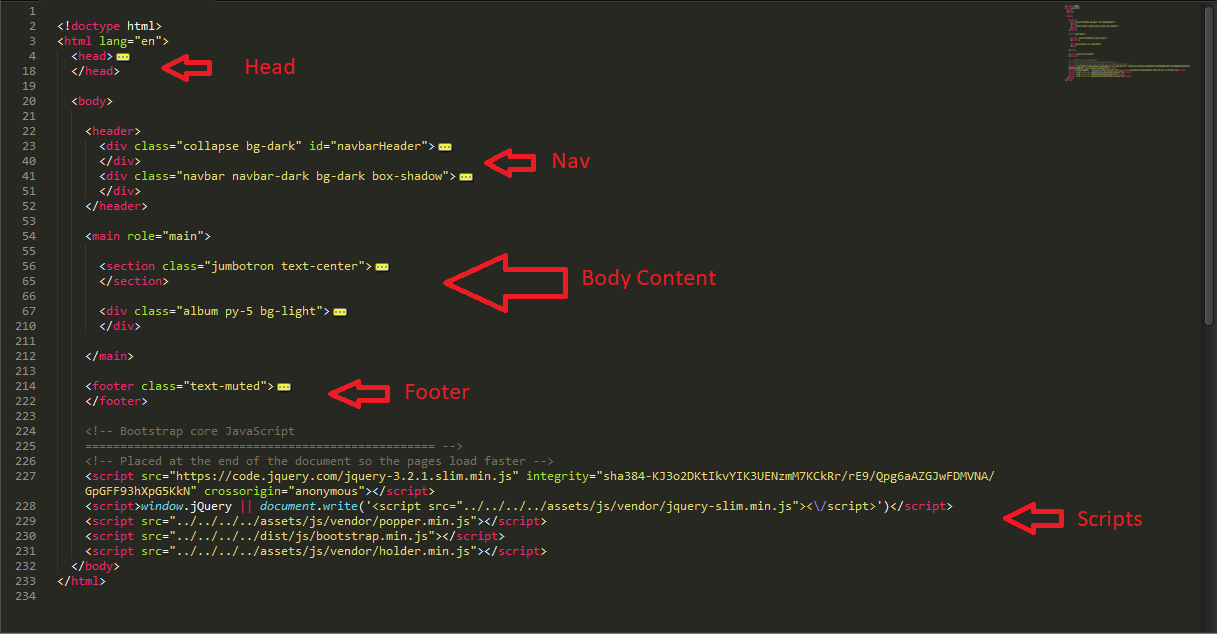
Now as you can see the code of your template. It consists of unlike parts and I will create a layout in which I'll go along all the partial parts of the layout split.
Become to resources/view folder and create a new binder with the name, layouts. This folder will contain the master layout (and other files that will be included in the layout).
Now, create some other folder and name it partials. This folder will contain fractional files such equally header and footer that volition be used past the layout file.
Get to the layout folder and create a file named mainlayout.blade.php. Add the following code to it:
<!DOCTYPE html> <html lang="en"> <caput> @include('layout.partials.caput') </head> <torso> @include('layout.partials.nav' @include('layout.partials.header') @yield('content') @include('layout.partials.footer') @include('layout.partials.footer-scripts') </body> </html> This code creates a layout file that will include (@include) all the contents of the specified file at the desired location within the HTML file. @yield will put the specified content of the file which is extending this layout.
Create Partial Files
Next, create partial files that are included in the main layout file. Go to the partials folder and create a file named head.blade.php. This file will contain the content that goes into the head department of the folio.
<meta charset="utf-8"> <meta proper name="viewport" content="width=device-width, initial-calibration=1, shrink-to-fit=no"> <meta name="description" content=""> <meta name="writer" content=""> <title>Album case for Bootstrap</title> <!-- Bootstrap core CSS --> <link rel="stylesheet" href="https://maxcdn.bootstrapcdn.com/bootstrap/iv.0.0-blastoff.6/css/bootstrap.min.css" integrity="sha384-rwoIResjU2yc3z8GV/NPeZWAv56rSmLldC3R/AZzGRnGxQQKnKkoFVhFQhNUIyJ" crossorigin="anonymous"> <!-- Custom styles for this template --> <link href="/css/album.css" rel="stylesheet">
Create a file nav.blade.php. This file will contain the code related to creating the navigation of the bootstrap page
<div class="collapse bg-inverse" id="navbarHeader"> <div class="container"> <div class="row"> <div grade="col-sm-viii py-iv"> <h4 class="text-white">Nearly</h4> <p class="text-muted">Add some data about the anthology below, the writer, or any other groundwork context. Make information technology a few sentences long so folks tin pick upwardly some informative tidbits. And so, link them off to some social networking sites or contact information.</p> </div> <div class="col-sm-4 py-four"> <h4 form="text-white">Contact</h4> <ul class="list-unstyled"> <li><a href="#" form="text-white">Follow on Twitter</a></li> <li><a href="#" grade="text-white">Like on Facebook</a></li> <li><a href="#" class="text-white">E-mail me</a></li> </ul> </div> </div> </div> </div> <div course="navbar navbar-inverse bg-inverse"> <div class="container d-flex justify-content-betIen"> <a href="#" class="navbar-make">Album</a> <push button class="navbar-toggler" blazon="button" data-toggle="collapse" data-target="#navbarHeader" aria-controls="navbarHeader" aria-expanded="false" aria-label="Toggle navigation"> <bridge class="navbar-toggler-icon"></bridge> </button> </div> </div>
Next, create the file header.blade.php. This file will contain the visible header of the Bootstrap page.
<department class="jumbotron text-center"> <div class="container"> <h1 class="jumbotron-heading">Anthology instance</h1> <p class="lead text-muted">Something curt and leading nigh the drove below—its contents, the creator, etc. Make information technology short and sIet, but not too brusk so folks don't simply skip over it entirely.</p> <p> <a href="#" course="btn btn-chief">Main call to action</a> <a href="#" class="btn btn-secondary">Secondary action</a> </p> </div> </department>
The next step is to create the file for a footer. For this, create a file named footer.blade.php.
<footer class="text-muted"> <div form="container"> <p course="float-correct"> <a href="#">Back to pinnacle</a> </p> <p>Anthology example is © Bootstrap, but delight download and customize it for yourself!</p> <p>New to Bootstrap? <a href="../../">Visit the homepage</a> or read our <a href="../../getting-started/">getting started guide</a>.</p> </div> </footer>
Now create a file named footer-scripts.blade.php that contains the JS files that should be included in the lesser of the page.
<!-- Bootstrap core JavaScript ================================================= --> <!-- Placed at the end of the document and so the pages load faster --> <script src="https://code.jquery.com/jquery-3.ane.one.slim.min.js" integrity="sha384-A7FZj7v+d/sdmMqp/nOQwliLvUsJfDHW+k9Omg/a/EheAdgtzNs3hpfag6Ed950n" crossorigin="anonymous"></script> <script src="https://cdnjs.cloudflare.com/ajax/libs/tether/1.4.0/js/tether.min.js" integrity="sha384-DztdAPBWPRXSA/3eYEEUWrWCy7G5KFbe8fFjk5JAIxUYHKkDx6Qin1DkWx51bBrb" crossorigin="anonymous"></script> <script src="https://maxcdn.bootstrapcdn.com/bootstrap/iv.0.0-alpha.half-dozen/js/bootstrap.min.js" integrity="sha384-vBWWzlZJ8ea9aCX4pEW3rVHjgjt7zpkNpZk+02D9phzyeVkE+jo0ieGizqPLForn" crossorigin="anonymous"></script>
After creating all the views files, the views binder should look something like this:

That'southward it, The sample Bootstrap template Album Bootstrap is now integrated with Laravel.

Get Your VueJS Handbook Now
Uncomplicated enter your e-mail accost and become the download link in your Inbox.
Thank You lot
Your Ebook is on information technology's Style to Your Inbox.
Testing the Integration
Let'southward create a view file that extends this layout file and then that you tin can run into the Bootstrap layout integration with the Laravel Bract template in action.
Create a file demo.bract.php in the views folder and add together the following content to the file:
@extends('layout.mainlayout') @section('content') <div class="album text-muted"> <div class="container"> <div grade="row"> <h1>This is a demo text</h1> <p>Lorem ipsum dolor sit amet, consectetur adipiscing elit. Sed egestas dolor vulputate quam convallis consequat. Quisque eu lorem eget magna lacinia suscipit. Maecenas condimentum vehicula eros. Fusce massa lacus, blandit et leo sed, accumsan commodo sem. Sed eget pulvinar tellus. Praesent ex diam, sodales at consequat id, viverra ut dolor. In eget orci sit amet magna sagittis mattis sit amet sed augue. Vivamus facilisis libero ligula, vel sodales ipsum sollicitudin id. Duis vitae urna rutrum, dignissim arcu ac, elementum augue. Quisque id interdum ligula. Donec tincidunt feugiat massa sed aliquam. Duis european union vehicula turpis.</p> </div> </div> </div> @endsection Create the Routes
Now that the view is created, the next step is the creation of a route to access the view. For this, go to routes/web.php and paste the following routes.
Road::become('/demo', function () { return view('demo'); }); At present run the awarding using the staging URL. You volition see the Album Bootstrap template integrated with your application.
Integrate Bootstrap Admin Template in Laravel
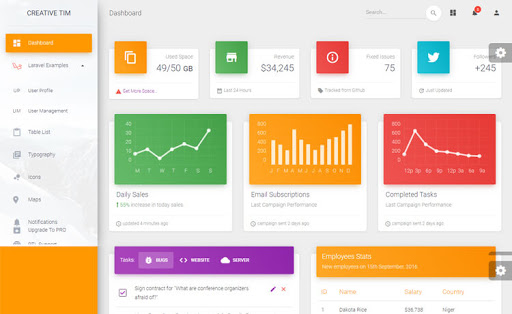
In this instance, I will demonstrate how to integrateAbsurd Admin Dashboard into a Laravel app. It will thoroughly explain to you how easy it is to integrate bootstrap themes in the Laravel application.
Hither is an example illustrating the step-by-footstep procedure of integrating the admin theme into an app. It is one of the major requirements of whatever web application, as it allows us to manage various components of the website just from the dashboard.
In this tutorial, I volition create 2 pages later the integration of the theme. In these two pages, I will use our integrated theme. That pages will acquit the following names.
1) my-home
2) my-users
Download Cool Admin Dashboard
First of all, download whatsoever dashboard you like to integrate with your Laravel app. I take downloaded the Absurd Admin Dashboard as it is piece of cake to utilise and has a user-friendly interface. After the download is complete, excerpt the JS, CSS files, and icons from it and put it within the Laravel application.
Secondly, create a theme folder within the public folder and re-create all the data into that theme directory.
Config Route
Now, I will add two routes "my-home" and "my-users" for two pages. Open the road file and add the following route lawmaking:
routes/web.php Route::become('my-abode', '[e-mail protected]'); Route::become('my-users', '[email protected]'); Add Controller
In this step, I will create a new HomeController and add two methods for the dashboard page and my user's page. Blazon the following code on for the HomeController.
app/Http/Controllers/HomeController.php <?php namespace App\Http\Controllers; use Illuminate\Http\Request; use App\Item; class HomeController extends Controller { /** * Create a new controller instance. * * @return void */ public part __construct() { } /** * Show the application dashboard. * * @render \Illuminate\Http\Response */ public role myHome() { return view('myHome'); } /** * Show the my users page. * * @render \Illuminate\Http\Response */ public function myUsers() { return view('myUsers'); } } Set Theme Blade Files
The next pace is to set up theme blade files. I volition create three files for the Cool Admin Dashboard theme. If you have any other large theme, and then you tin can also create some more files to manage it. I will create a theme folder containing three files within the view folder:
The three files are named as:
ane)default.blade.php
2)header.bract.php
3)sidebar.blade.php
Now I accept to add code for these iii files every bit listed below:
resource/views/theme/default.bract.php <!DOCTYPE html> <html lang="en"> <head> <meta charset="utf-8"> <meta http-equiv="10-UA-Compatible" content="IE=edge"> <meta proper name="viewport" content="width=device-width, initial-scale=ane"> <meta name="clarification" content=""> <meta name="writer" content=""> <championship>SB Admin ii - Bootstrap Admin Theme</title> <!-- Bootstrap Core CSS --> <link href="{!! asset('theme/vendor/bootstrap/css/bootstrap.min.css') !!}" rel="stylesheet"> <!-- MetisMenu CSS --> <link href="{!! asset('theme/vendor/metisMenu/metisMenu.min.css') !!}" rel="stylesheet"> <!-- Custom CSS --> <link href="{!! asset('theme/dist/css/sb-admin-two.css') !!}" rel="stylesheet"> <!-- Morris Charts CSS --> <link href="{!! asset('theme/vendor/morrisjs/morris.css') !!}" rel="stylesheet"> <!-- Custom Fonts --> <link href="{!! nugget('theme/vendor/font-awesome/css/font-awesome.min.css') !!}" rel="stylesheet" type="text/css"> </head> <body> <div id="wrapper"> <!-- Navigation --> <nav form="navbar navbar-default navbar-static-top" role="navigation" style="margin-bottom: 0"> @include('theme.header') @include('theme.sidebar') </nav> <div id="folio-wrapper"> @yield('content') </div> <!-- /#page-wrapper --> </div> <!-- /#wrapper -- <!-- jQuery --> <script src="{!! asset('theme/vendor/jquery/jquery.min.js') !!}"></script> <!-- Bootstrap Core JavaScript --> <script src="{!! asset('theme/vendor/bootstrap/js/bootstrap.min.js') !!}"></script> <!-- Metis Carte du jour Plugin JavaScript --> <script src="{!! asset('theme/vendor/metisMenu/metisMenu.min.js') !!}"></script> <!-- Morris Charts JavaScript --> <script src="{!! asset('theme/vendor/raphael/raphael.min.js') !!}"></script> <script src="{!! nugget('theme/vendor/morrisjs/morris.min.js') !!}"></script> <script src="{!! nugget('theme/data/morris-data.js') !!}"></script <!-- Custom Theme JavaScript --> <script src="{!! asset('theme/dist/js/sb-admin-2.js') !!}"></script> </body> </html> Setup Header Insert the post-obit code inside the directory file resources/views/theme/header.bract.php <nav class="navbar navbar-expand-lg navbar-transparent navbar-absolute fixed-tiptop "> <div class="container-fluid"> <div class="navbar-wrapper"> <a grade="navbar-brand" href="#pablo">Dashboard</a> </div> <push button form="navbar-toggler" type="push button" data-toggle="collapse" aria-controls="navigation-alphabetize" aria-expanded="imitation" aria-label="Toggle navigation"> <bridge class="sr-just">Toggle navigation</bridge> <span class="navbar-toggler-icon icon-bar"></bridge> <span grade="navbar-toggler-icon icon-bar"></span> <span form="navbar-toggler-icon icon-bar"></span> </push> <div course="collapse navbar-plummet justify-content-end"> <form class="navbar-form"> <span grade="bmd-class-group"><div class="input-group no-border"> <input type="text" value="" class="grade-control" placeholder="Search..."> <push button type="submit" class="btn btn-white btn-round btn-just-icon"> <i class="material-icons">search</i> <div course="ripple-container"></div> </push> </div></span> </form> <ul class="navbar-nav"> <li grade="nav-item"> <a class="nav-link" href="#pablo"> <i course="material-icons">dashboard</i> <p course="d-lg-none d-md-block"> Stats </p> </a> </li> <li grade="nav-item dropdown"> <a course="nav-link" href="http://example.com" id="navbarDropdownMenuLink" data-toggle="dropdown" aria-haspopup="true" aria-expanded="simulated"> <i class="cloth-icons">notifications</i> <span grade="notification">5</span> <p course="d-lg-none d-md-block"> Some Actions </p> </a> <div form="dropdown-menu dropdown-carte-right" aria-labelledby="navbarDropdownMenuLink"> <a course="dropdown-item" href="#">Mike John responded to your e-mail</a> <a grade="dropdown-particular" href="#">Y'all have 5 new tasks</a> <a class="dropdown-particular" href="#">You're now friend with Andrew</a> <a form="dropdown-item" href="#">Some other Notification</a> <a class="dropdown-item" href="#">Another One</a> </div> </li> <li class="nav-particular dropdown"> <a form="nav-link" href="#pablo" id="navbarDropdownProfile" information-toggle="dropdown" aria-haspopup="true" aria-expanded="fake"> <i class="fabric-icons">person</i> <p form="d-lg-none d-md-block"> Account </p> </a> <div class="dropdown-card dropdown-menu-right" aria-labelledby="navbarDropdownProfile"> <a form="dropdown-item" href="#">Contour</a> <a grade="dropdown-detail" href="#">Settings</a> <div class="dropdown-divider"></div> <a form="dropdown-item" href="#">Log out</a> </div> </li> </ul> </div> </div> </nav> Sidebar
Afterward successfully setting up the header, it's time to set upwardly the sidebar. Type the following code.
<div class="sidebar" data-color="purple" information-groundwork-color="white" data-paradigm="../assets/img/sidebar-ane.jpg"> <!-- Tip ane: You tin can change the color of the sidebar using: information-color="imperial | azure | dark-green | orange | danger" Tip 2: y'all can also add an paradigm using data-paradigm tag --> <div course="logo"> <a href="http://world wide web.creative-tim.com" class="simple-text logo-normal"> Creative Tim </a> </div> <div grade="sidebar-wrapper ps-container ps-theme-default" information-ps-id="d8631889-919e-0705-2d4b-159fdbdfe8cd"> <ul class="nav"> <li class="nav-item agile "> <a course="nav-link" href="./dashboard.html"> <i class="fabric-icons">dashboard</i> <p>Dashboard</p> </a> </li> <li grade="nav-item "> <a class="nav-link" href="./user.html"> <i class="fabric-icons">person</i> <p>User Profile</p> </a> </li> <li class="nav-item "> <a form="nav-link" href="./tables.html"> <i course="fabric-icons">content_paste</i> <p>Tabular array Listing</p> </a> </li> <li grade="nav-item "> <a class="nav-link" href="./typography.html"> <i form="fabric-icons">library_books</i> <p>Typography</p> </a> </li> <li class="nav-item "> <a class="nav-link" href="./icons.html"> <i course="material-icons">bubble_chart</i> <p>Icons</p> </a> </li> <li class="nav-item "> <a grade="nav-link" href="./map.html"> <i form="material-icons">location_ons</i> <p>Maps</p> </a> </li> <li class="nav-detail "> <a class="nav-link" href="./notifications.html"> <i class="material-icons">notifications</i> <p>Notifications</p> </a> </li> <li class="nav-detail "> <a class="nav-link" href="./rtl.html"> <i course="material-icons">linguistic communication</i> <p>RTL Support</p> </a> </li> <li class="nav-item active-pro "> <a class="nav-link" href="./upgrade.html"> <i course="material-icons">unarchive</i> <p>Upgrade to PRO</p> </a> </li> </ul> <div class="ps-scrollbar-x-rail" style="left: 0px; bottom: 0px;"><div class="ps-scrollbar-x" tabindex="0" manner="left: 0px; width: 0px;"></div></div><div class="ps-scrollbar-y-rails" style="top: 0px; right: 0px;"><div class="ps-scrollbar-y" tabindex="0" style="superlative: 0px; height: 0px;"></div></div></div> <div form="sidebar-groundwork" fashion="background-image: url(../assets/img/sidebar-1.jpg) "></div></div>
Home
In this step, I will create two new bract files using the integrated theme layout. I have added 2 routes one for dwelling and some other for users. Let'south create two files and see how the integrated theme works.
resources/views/myHome.blade.php @extends('theme.default') @section('content') @endsection Employee Table
resources/views/myUsers.bract.php <div class="col-lg-six col-md-12"> <div class="carte du jour"> <div course="card-header card-header-warning"> <h4 class="carte-championship">Employees Stats</h4> <p class="card-category">New employees on 15th September, 2016</p> </div> <div class="card-body tabular array-responsive"> <table class="tabular array tabular array-hover"> <thead form="text-alarm"> <tr><th>ID</th> <thursday>Name</th> <th>Salary</th> <thursday>State</th> </tr></thead> <tbody> <tr> <td>1</td> <td>Dakota Rice</td> <td>$36,738</td> <td>Niger</td> </tr> <tr> <td>2</td> <td>Minerva Hooper</td> <td>$23,789</td> <td>Curaçao</td> </tr> <tr> <td>three</td> <td>Sage Rodriguez</td> <td>$56,142</td> <td>Netherlands</td> </tr> <tr> <td>4</td> <td>Philip Chaney</td> <td>$38,735</td> <td>Korea, Southward</td> </tr> </tbody> </table> </div> </div> </div>
Popular Laravel Bootstrap Templates
OneUI

OneUI is a template – made for Laravel apps – built on Bootstrap. It is a user interface that allows developers to create a professional, flexible, and fully manageable admin console for all kinds of projects.
Material Dashboard Laravel
Material Dashboard Laravel boosts up the development process, inspired by Google's new material pattern. It has a user-friendly frontend and a fully functional Laravel backend. The dashboard facilitates developers to manage users with out-of-the-box CRUD techniques.
Blackness Dashboard Laravel
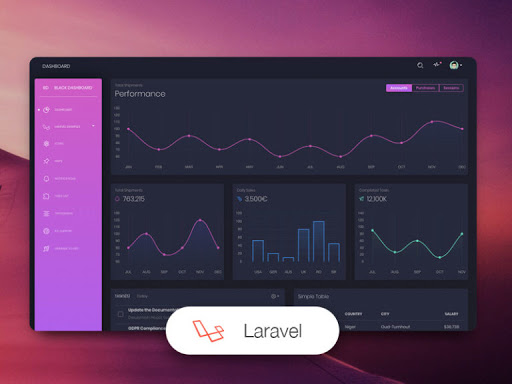
Black Dashboard Laravel uses frontend components that are customizable and easy to understand. It uses an middle-on-color combination, vibrant plenty to run an efficient analysis in your evolution process with spacious cards and typography.
Angle
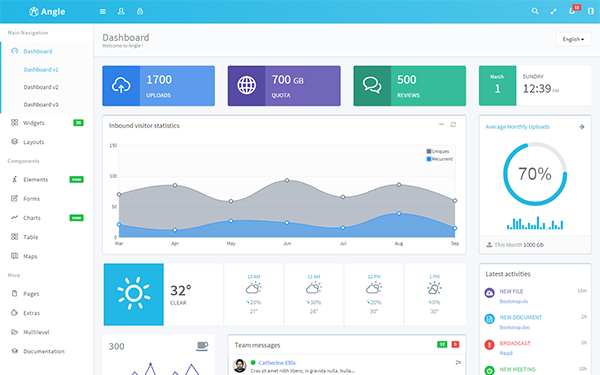
The Angle is a dynamic admin console that is compatible with Laravel and many other frameworks. Developers can use this console in whatsoever type of application dashboard for edifice Single page apps (SPA), eCommerce apps, project management systems, etc. The components of this dashboard facilitate developers to work with HTML5, Bootstrap, JS, CSS, and other major technologies.
100% Secure and Completely Managed Laravel Hosting
Our secure and managed hosting solution offers complete peace of listen
To Sum Up
In this article, I take demonstrated the integration of Cool Admin Dashboard into a Laravel app and also shown how to configure a customized theme in the application. Both integration techniques are illustrated in quite a detail, and hopefully, they volition work out for you, and help you develop an optimized web awarding(s).
If you lot still accept questions nigh this tutorial, experience free to use the comments section for your inquiries
In this tutorial, I have demonstrated an easy way of integrating whatever Bootstrap template in a Laravel application. If y'all take whatsoever questions kindly comment below. Also, follow me on Twitter and get continued.
Does Laravel utilize bootstrap?
Laravel does not dictate which pre-processors, JavaScript or CSS you need to use, Nonetheless it does give a essential beginning bespeak utilizing Bootstrap, React, and / or Vue that will be supportive for numerous applications. By default, Laravel uses NPM to install both of these frontend packages.
Does Laravel 8 back up bootstrap?
laravel 8 requite unproblematic way to work with bootstrap, vue and react. Later effectively installing above package at that point we are prepared to install bootstrap iv with our application.
Share your opinion in the comment department. COMMENT NOW
Share This Article
Client Review at ![]()
"Cloudways hosting has one of the best client service and hosting speed"
Sanjit C [Website Programmer]
Saquib Rizwan
Saquib is a PHP Community Practiced at Cloudways - A Managed PHP Hosting Cloud Platform. He is well versed in PHP and regularly contributes to open source projects. For fun, he enjoys gaming, movies and hanging out with friends. Y'all can email him at [e-mail protected]

How To Include A Footer Template In Laravel 5.5,
Source: https://www.cloudways.com/blog/laravel-bootstrap-template-integration/
Posted by: bonetond1972.blogspot.com
0 Response to "How To Include A Footer Template In Laravel 5.5"
Post a Comment